Use Clinical Terminal in Claude Cowork
Claude Cowork and the Claude apps can query the Clinical Terminal graph directly — vendors, products, people, market signals, and hospital relationships — through a custom connector. This is the click-through version of our MCP setup guide: no terminal, no config files, about three minutes.
Step by step
Guide verified end-to-end against the Claude apps · August 2026
Step 1 — Get an API key
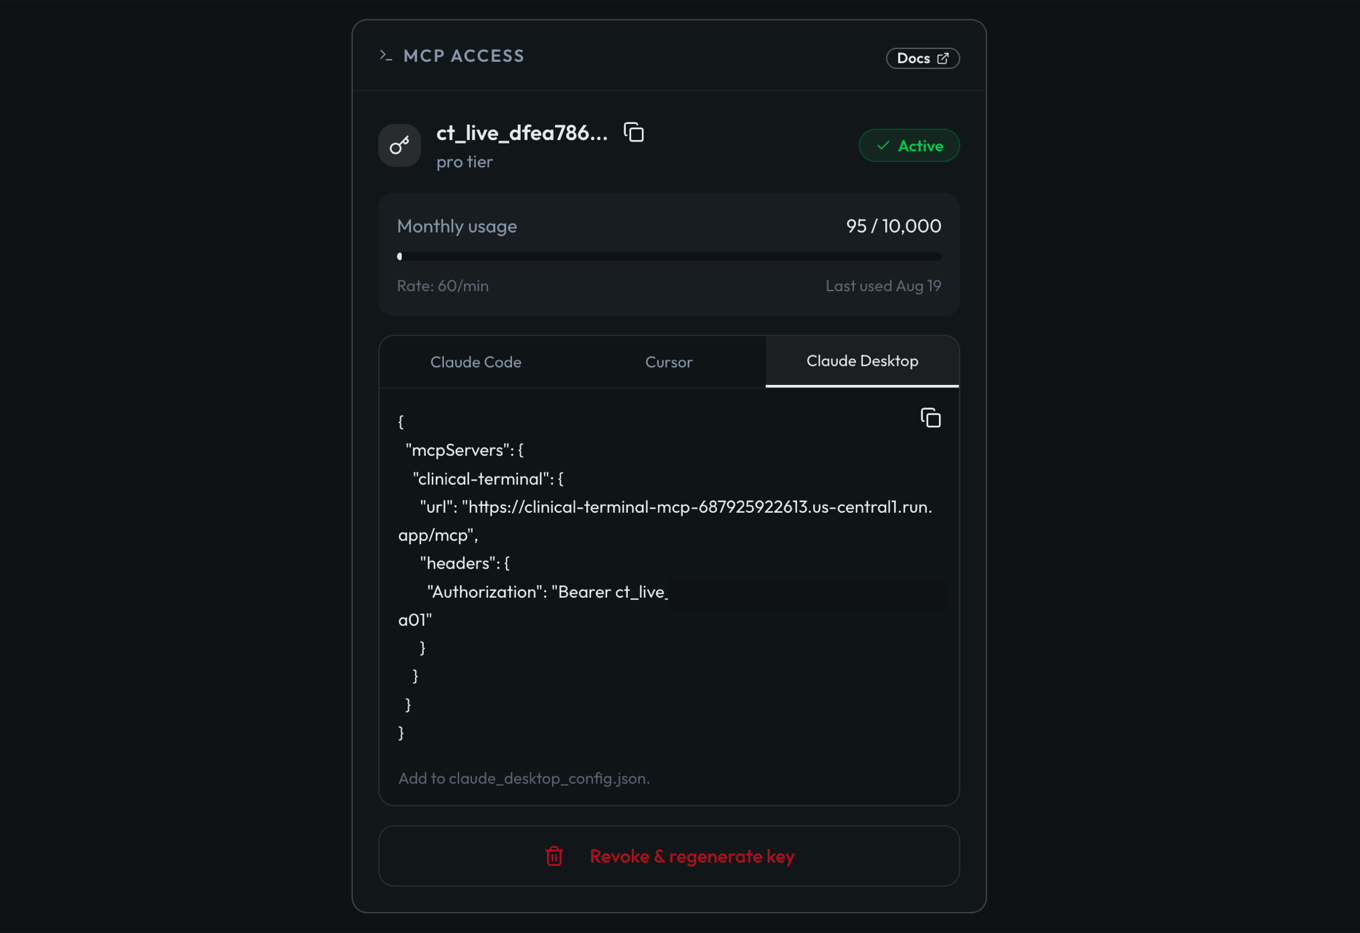
Sign in at app.clinicalterminal.com and open Settings → MCP Access, then click Create key. The full ct_live_… key is shown once — copy it somewhere safe. MCP access is included with the Landscape subscription.
Step 2 — Open Claude's connector settings
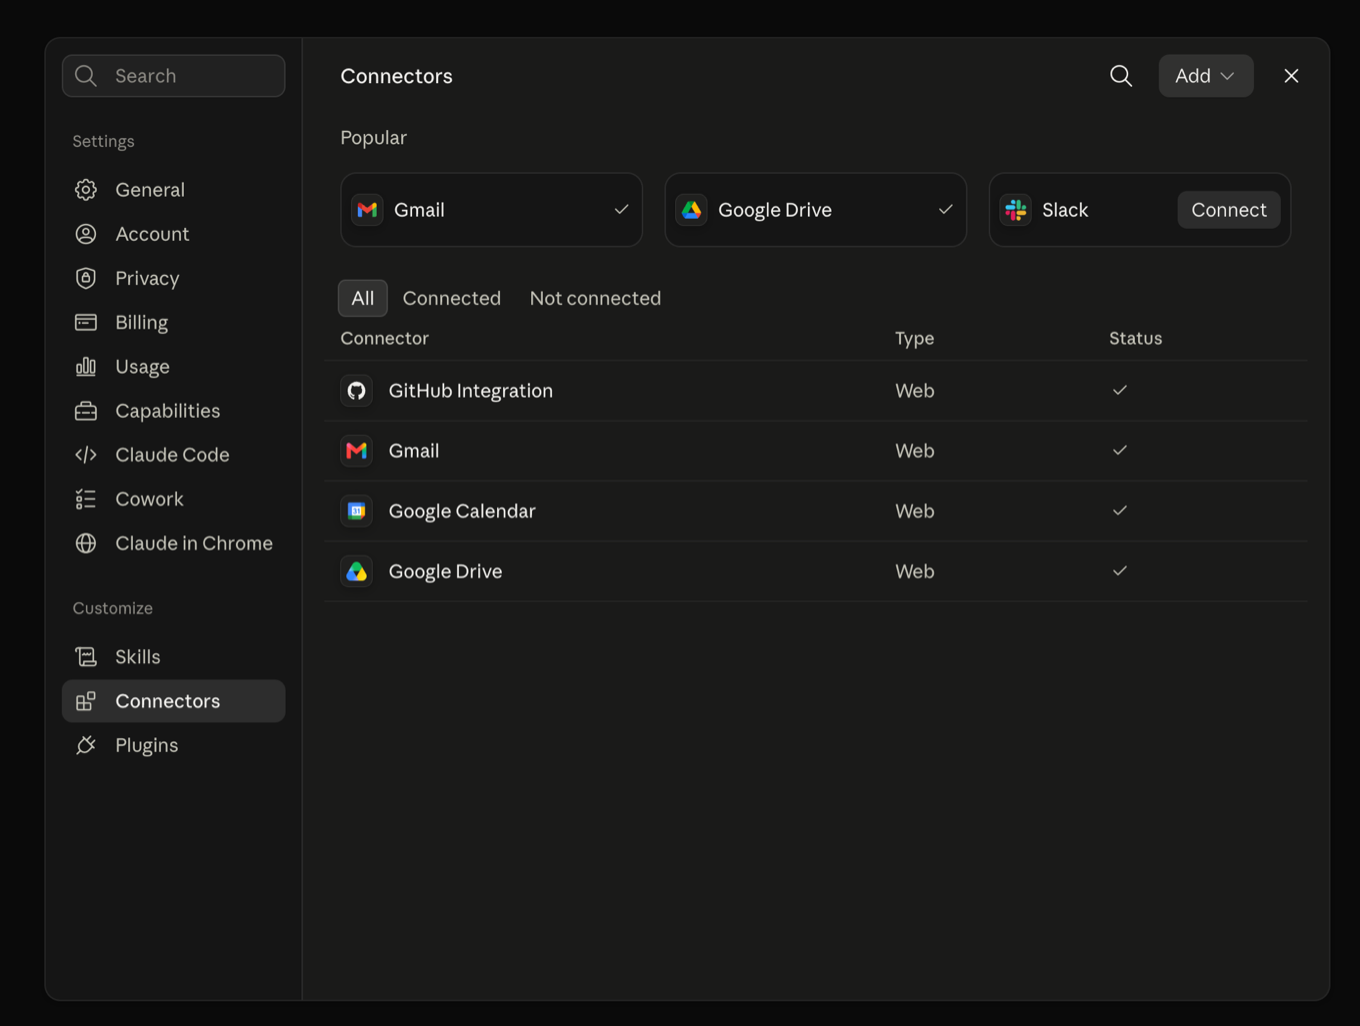
In the Claude desktop app or on claude.ai, open Settings → Connectors (the same Connectors list powers Cowork, chat, and Claude Code).
Step 3 — Add the custom connector
Click Add and choose the custom connector option. Name it Clinical Terminal and paste the server URL:
https://clinical-terminal-mcp-687925922613.us-central1.run.app/mcp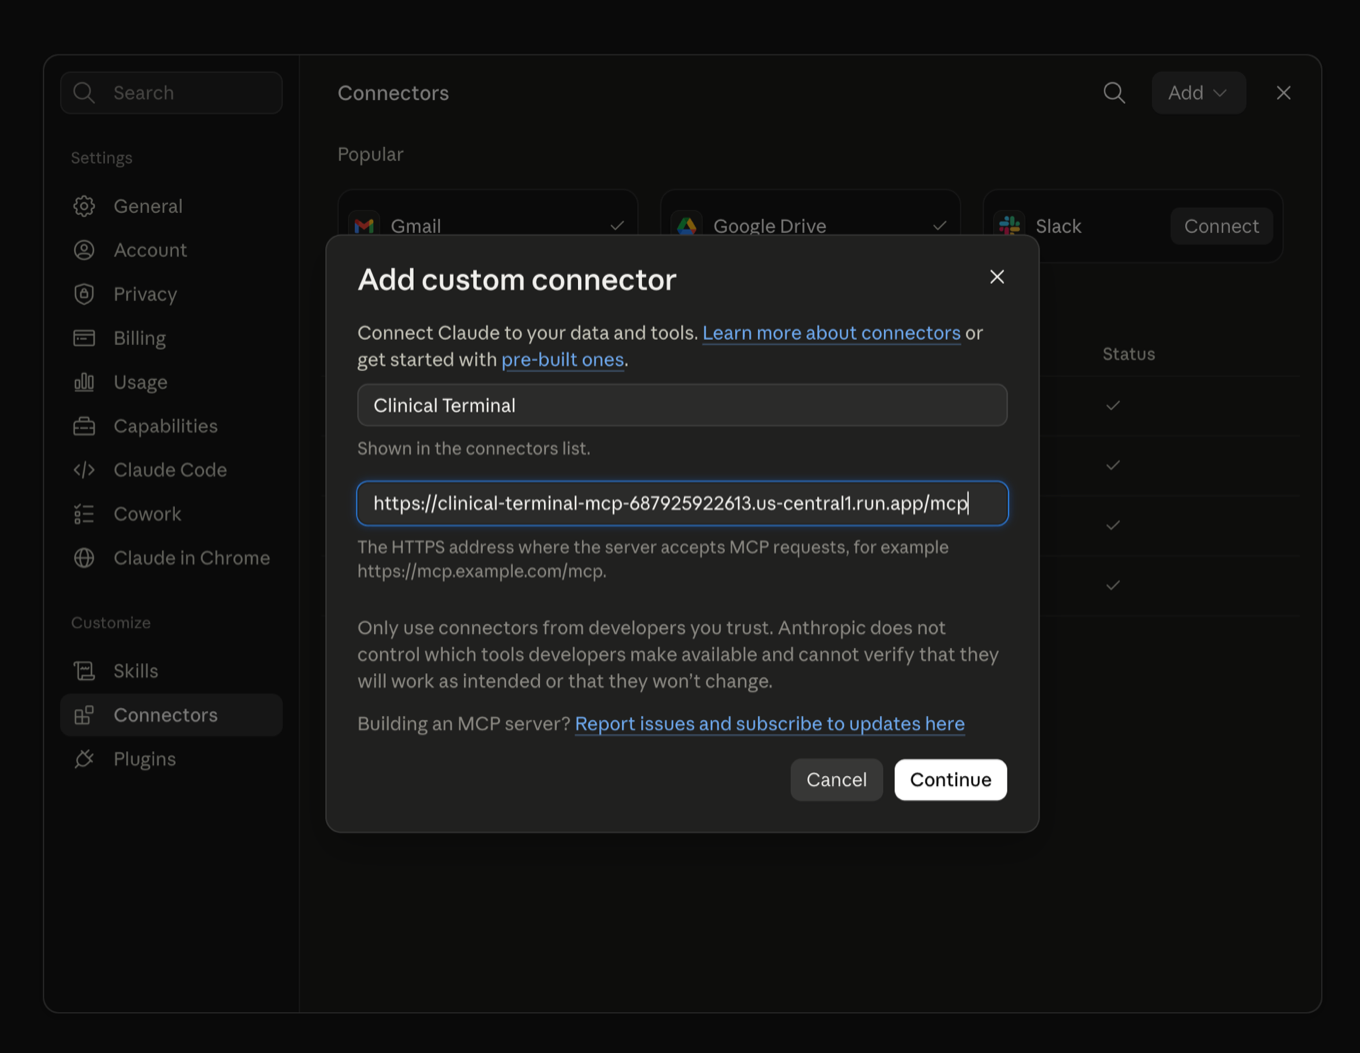
Hit Continue. On the authentication screen that follows, two settings matter:
- Under Authentication, choose None — Claude's own description of that option (“for servers that use an API key instead of OAuth”) is exactly our case. “Always required” comes preselected with a “Detected” badge because the server rejects anonymous probes — leave it selected and Claude will walk you into an OAuth sign-in the server doesn't offer.
- Under Request headers, click Add header, pick
api-keyfrom the header dropdown, and paste your full key as the value — no prefix, exactly as it was shown at creation (Claude stores it securely and never shows it again). Then hit Add:
ct_live_<your_key>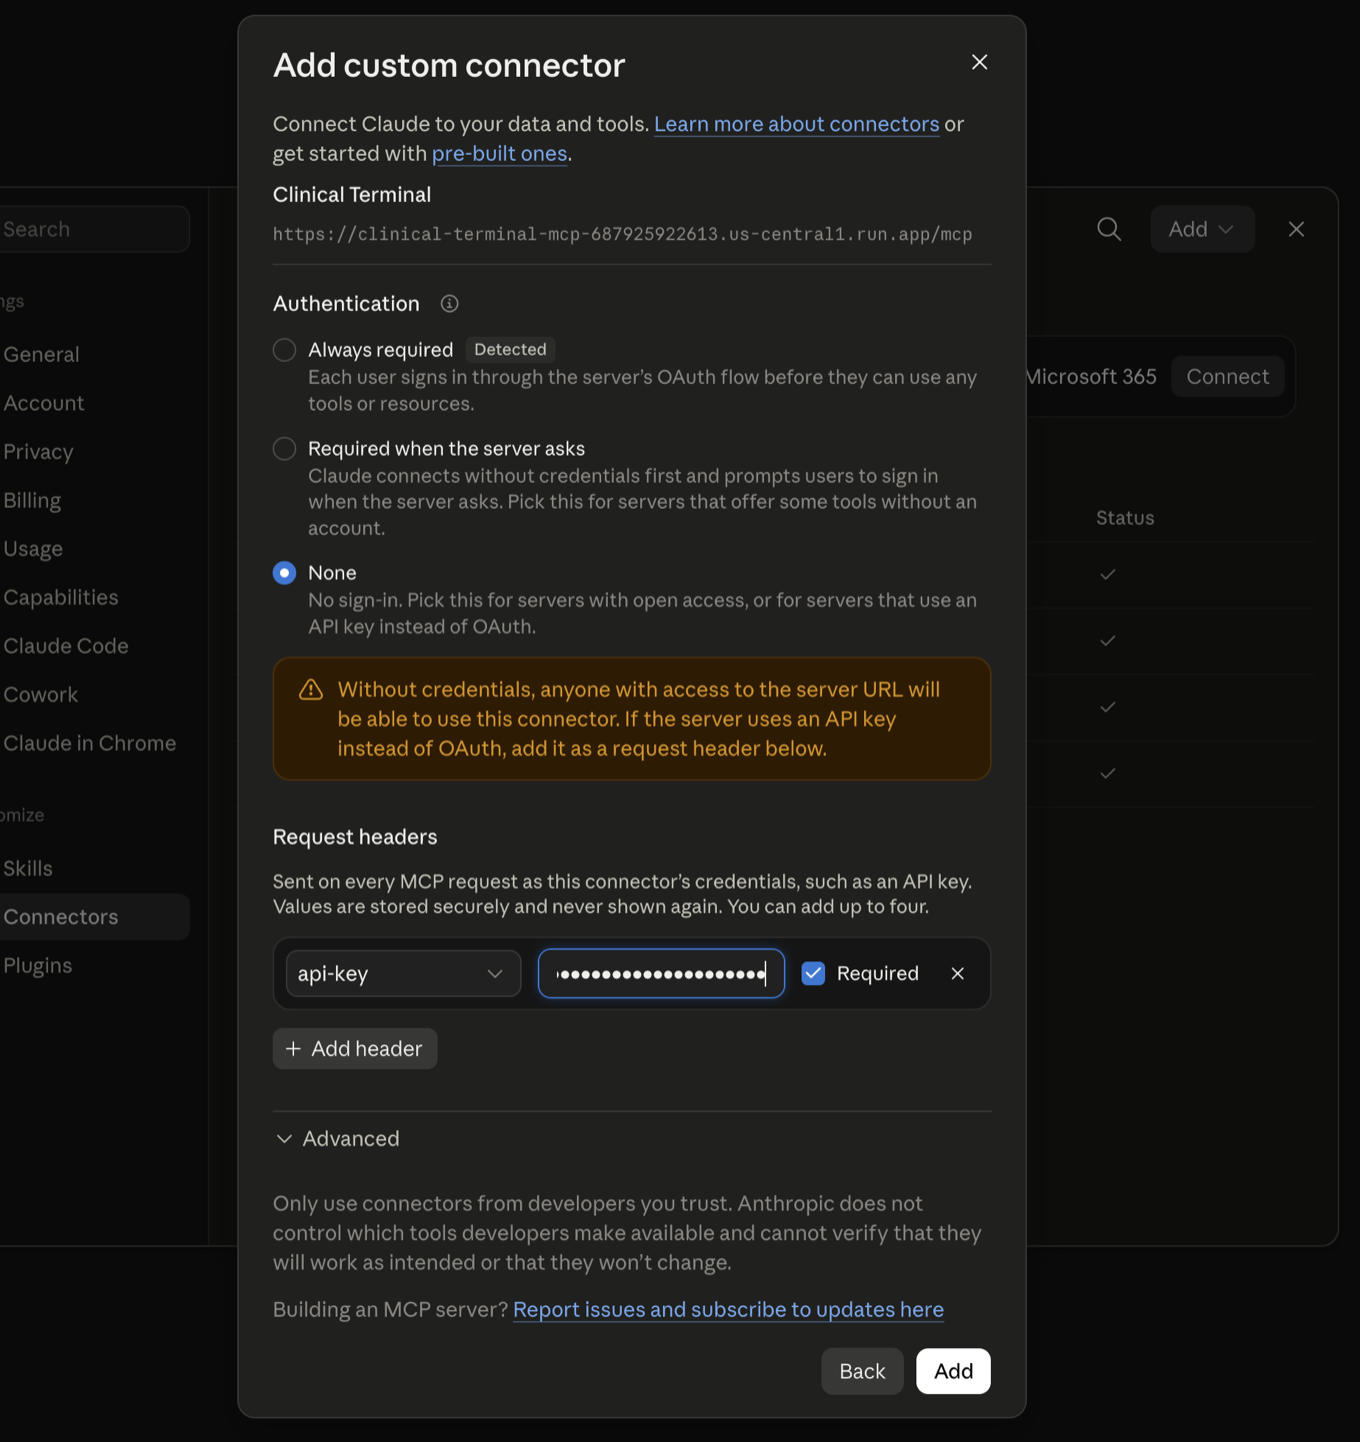
Step 4 — Connect, then verify it in Cowork
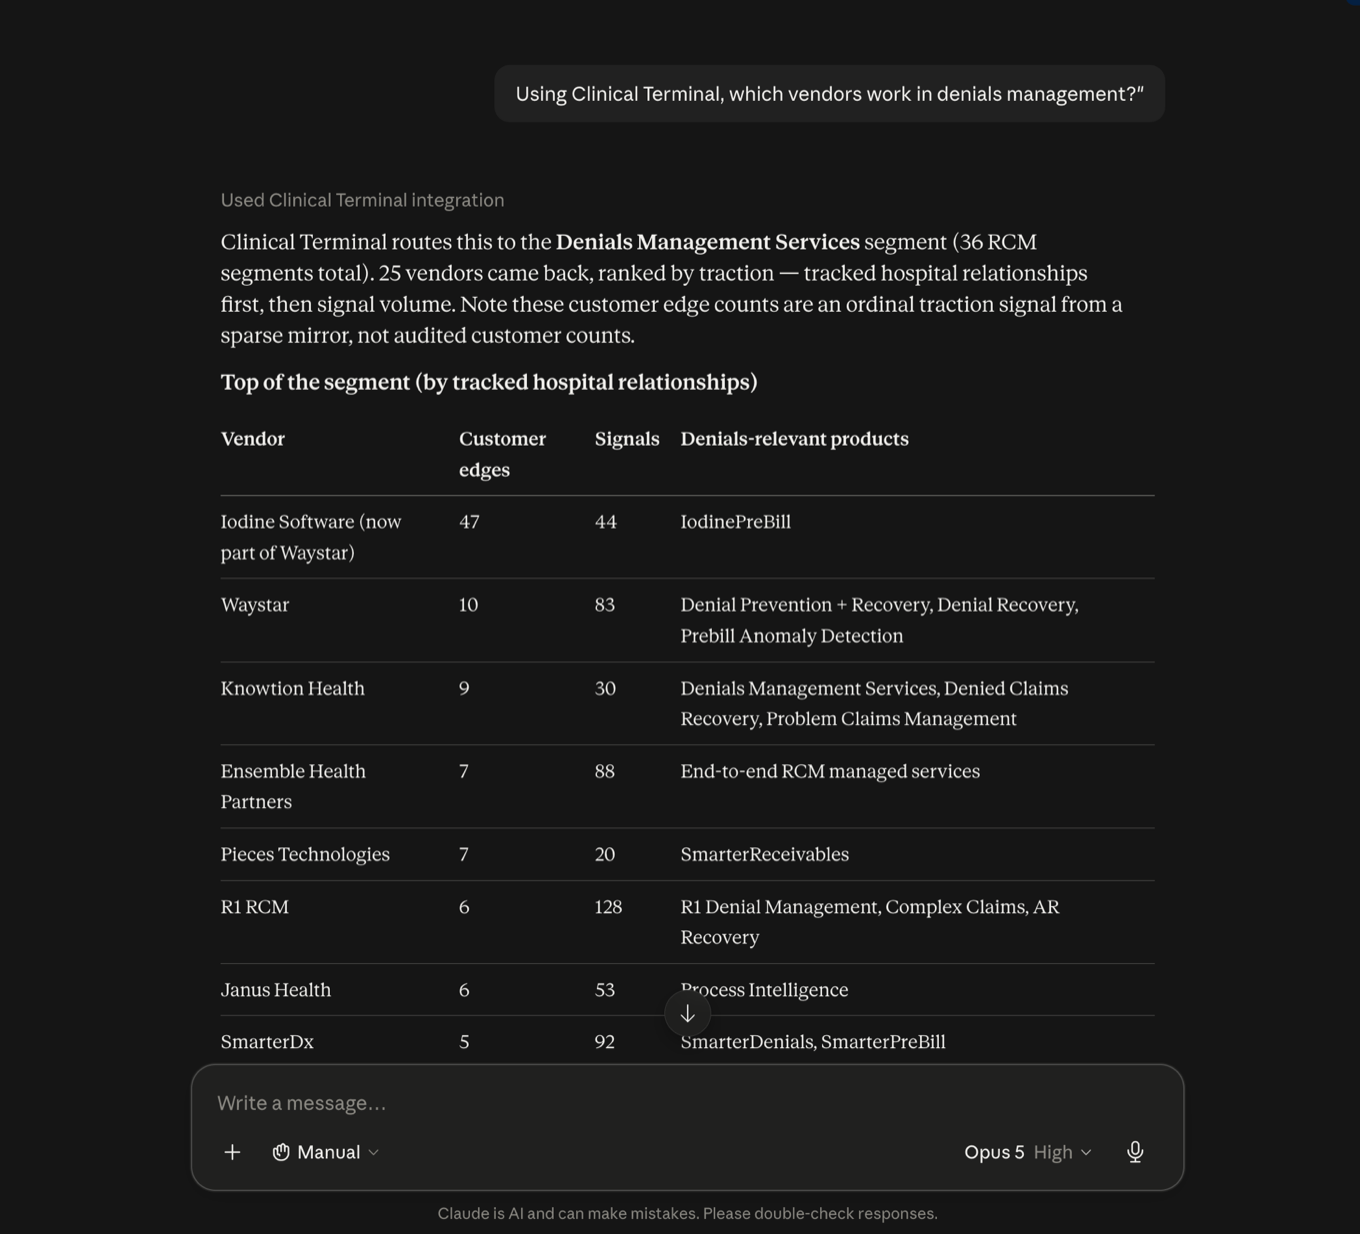
After adding, Claude shows the connector's page with “You are not connected to Clinical Terminal yet” — click Connect. With authentication set to None there is no sign-in step; it should flip to connected immediately. Then start a Cowork session (or a chat), make sure the Clinical Terminal connector is enabled in the tools menu, and ask a real question: “Using Clinical Terminal, which vendors work in denials management?” You should see Claude call the connector and come back with named vendors.
Step 5 — Tool permissions (recommended)
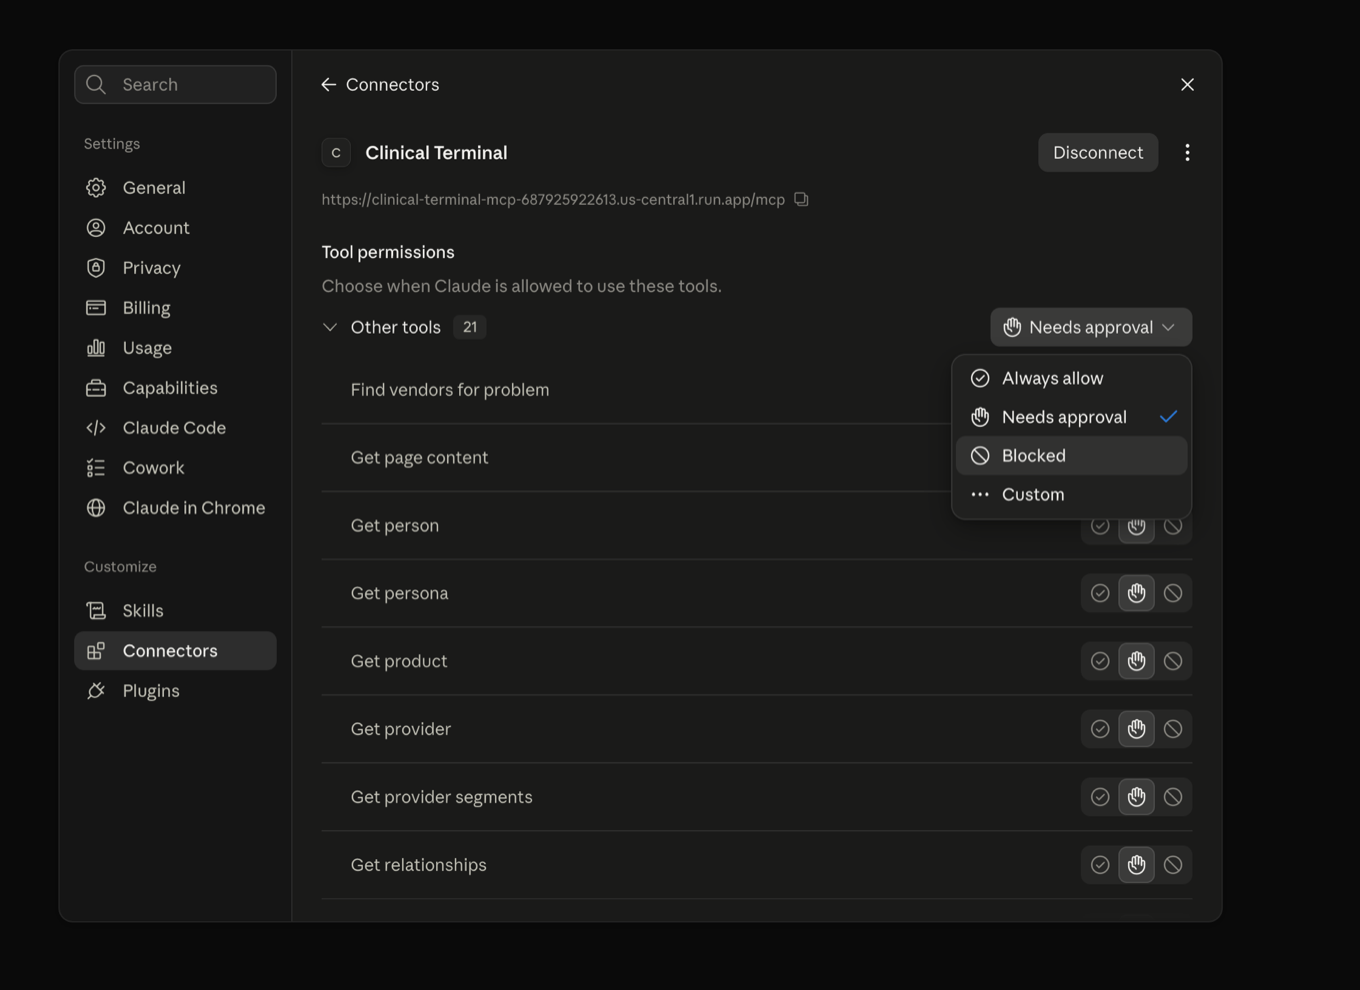
Every tool defaults to Needs approval, which pauses a Cowork session to ask before each call. On the connector's page, set Other tools → Always allow — every research tool is read-only, so this is safe. The one exception worth keeping gated: Publish comparison creates a shareable public page, so leave it on Needs approval.
Troubleshooting
- 401 — The Authorization header never reached the server — re-check the Request headers field on the connector.
- 403 — Invalid or revoked key, or over the monthly quota (resets on the 1st).
- 404 “Unknown or expired session” — The server-side session was lost (instance recycled). Disconnect and reconnect the connector, or just retry — a compliant client re-initializes on its own.
- 400 “No session” — The client skipped initialization. Disconnect and reconnect the connector.
- 429 — Per-minute rate limit — wait a few seconds and retry.
- Claude shows an OAuth or sign-in prompt, or “Couldn't reach Clinical Terminal” — the usual cause: the connector's Authentication setting is still on the preselected “Always required (Detected)”, or the request header isn't set as
api-keywith your key as the value. Edit the connector and re-check both against Step 3 (the value must be re-entered — Claude never redisplays it). As a fallback, the Claude Code or generic setup uses the same key. - A new or updated tool isn't showing up — Claude saved the connector's tool list when it connected. Turn the Clinical Terminal connector off and on (or disconnect and reconnect it) to fetch the current one. Your key and settings stay as they are — nothing needs re-adding.
Server status: clinical-terminal-mcp-687925922613.us-central1.run.app/health answers unauthenticated with the running version. Questions: agent@clinicalterminal.com.